Friday, December 17, 2010

Tiny Planets (TOS Review)

My husband is a computer geek.  My girls, evidently, have inherited the computer-geek gene, as they love all things related to the computer.  Of course, then, they were excited to hear that we'd be reviewing the Tiny Planets website, an award-winning online community based on space exploration, as part of the TOS review crew.


I first reviewed the website, and decided that it was better suited for my 8-yo than my 10-yo.  The first day I let Puddin' play on it, she was just a tiny bit excited that she'd have something to review that was "just hers" that she wouldn't have to share with her older sister:


The main premise of the website is that Bing and Bong (the main characters) go on various adventures to protect the universe and to teach kids social responsibility and to take care of our own planet.  There are several parts to Tiny Planets for kids to explore.  


Tiny Planets TV includes lots of television episodes which were co-created with Sesame Workshop and which emphasize science education and early learning.  


Tiny Planets Fun in Bong's Corner includes puzzle games, comics and coloring books.   


Tiny Planets Books includes books for younger children with the popular characters Bing and Bong.  


Tiny Planets Learning is for parents, educators and homeschoolers and includes lesson plans and science experiments.  


The My Tiny Planets portion of the website was Puddin's favorite - this is where you complete missions for Bing and Bong, and also where you can create your own planet.


And that's not all - this website contains so much content it can't be described - it has to be experienced by your young space-lover!


You can find more general information about the website and its background at the Parents page. 


You must have a parent account to set up "cadet" accounts for your children.  Much of the site is free, but the parent account allows you to purchase "keys" which will unlock even more content.  I found the price for the keys to be very reasonable - 10 keys for $1.95, 25 keys for $3.95, 85 keys for $9.95, 250 for $25.95, or 600 for $49.95.  I also liked that the website gives you a choice of cadet names so that no inappropriate names can be chosen by children.  Also, the website is ad-free.
  
Puddin was immediately engaged in the website - I had to do very little to help her figure out how to maneuver through the website and play the games - and before I knew it she had befriended lots of other "cadets".  I'll admit I found it hard to maneuver through the games - guess that shows how technologically advanced today's kids are.  


The first day I allowed her to play for a couple hours, and she's asked to play again frequently since.  I think the educational value is better suited for younger children (even though the website states it's appropriate for ages 4-12), but that may be because Puddin' has always been intensely interested in space and has been able to name the planets, in order, since she was about 3.  (One of the continuing arguments in our household is whether or not Pluto is a planet.)  Hence, the space games on this website were right up her alley.


She *loved* the TV shows, especially that gadget-loaded furry white couch (you have to see it to understand!).  But her favorite part of the website was in the My Tiny Planets area where you can adopt your own planet to name and take care of, including choosing atmosphere, landscape, etc.  Pretty cool.


Puddin's only complaint was that our computer evidently isn't fast enough, as she got the "Loading" screen quite a bit. 


Now that I've seen how much Puddin' enjoys the website, I'll probably also allow Punkin' (the 10-yo) to play. While I think the educational content is a bit low for their ages, it's still a very enjoyable website and much better than many of the other websites out there geared toward kids.  I'll probably add it in to my list of "reward" choices for jobs well done.


To see other reviews of this product, click here. For giveaways, other product reviews and other fun things, follow the 2010-2011 TOS Homeschool Crew blog at:


Disclaimer: As part of the 2010-2011 TOS Homeschool Review Crew, I received the product described in this review at no cost in exchange for my fair, honest and unbiased (and not necessarily positive) review. No other compensation was received.


Wednesday, December 15, 2010

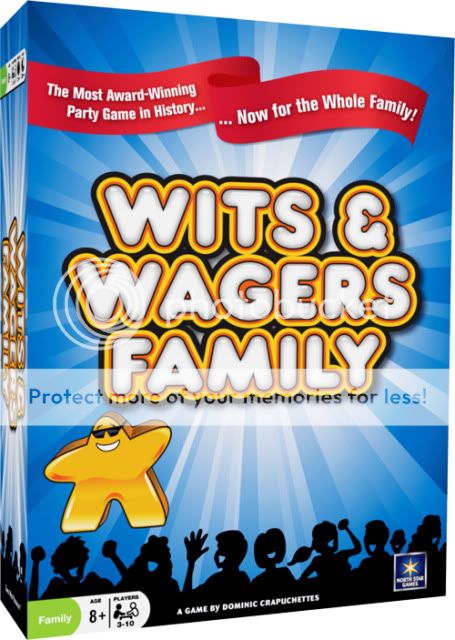
Wits & Wagers by Northstar Games (TOS Review)

We've loved just about everything we've received as part of the TOS Homeschool Review Crew, but I have to admit we were all excited when we learned we'd be receiving a *board game* to review, especially when it arrived during the Thanksgiving holiday season!  


The box was opened as soon as it arrived.  Out came Wits & Wagers Family, a game I had never heard of from a maker I had never heard of (North Star Games).  Wits & Wagers Family is meant to be played by ages 8+, and by 3-10 players/teams.
 

The game comes with: a scorecard (with circles to color in as you score points); 5 individual white boards and one "1" answer board; five dry erase pens; five sets of "meeples" (one small and one large meeple in colors matching the individual white boards); and a deck of question cards, each card containing two questions on the front, with the correct answers and a bit of trivia about each question on the back).

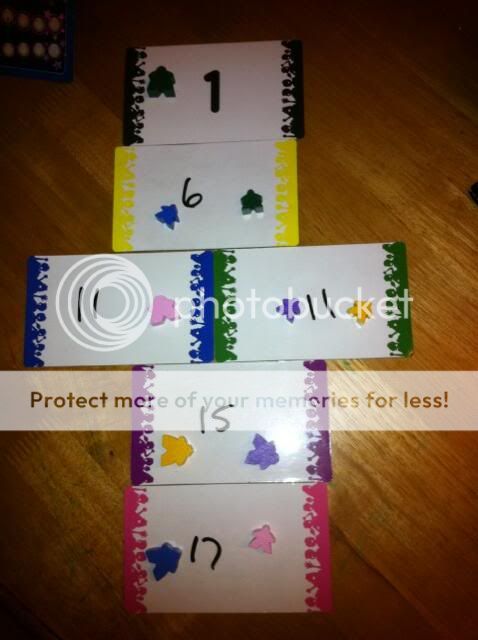
Easy instructions meant an easy explanation to my girls (8 and 10) who were anxious to immediately play - and play we did!  To play, a question is read (they recommend going through the entire deck by reading the first question on each card, then going back through the deck using the second questions).  Each player writes his best guess of the answer on his white board, and places it face down.  Once all players have guessed, the white boards are turned over and the guesses placed in numerical order (including the "1" card, which is always used). Then each player places his meeples on the guess that he thinks is closest to the correct answer without going over (when I explained this part, my oldest said "Hey, just like The Price is Right!"), which is considered the winning answer.  You can put both your meeples on the same guess or on two different guesses if you're not sure.  If you think all the guesses are too high, you can also put your meeples on the "1" card.


The correct answer is read (along with the trivia, which we thought was always interesting), and points are tallied for the winning answer - two points for a large meeple placed on the winning answer, one point for a small meeple placed on the winning answer, and one point to the person who wrote down the winning answer.  The first person to reach 15 points wins!

The questions cover a wide range of topics - from things you learned in elementary school (the boiling point of water), to things you've never really given a second thought (what percentage of U.S. kids ages 10-14 own a cell phone).  You don't even have to know the answer - you take a guess as to who might know the answer *best*, or just plain take your chances!

Another plus to this game is that it's quick - no two-hour game sessions with this one unless, like my girls, your kids say "Let's play again!" when you're done. 

My only wish is that they issue an expansion pack of question cards soon, because at the rate we're playing, we'll be done with all the questions before the New Year!

Wits & Wagers Family retails for $19.99 - a bargain in my book, considering all the fun my family has already had with this game.  Click here to buy, or visit your local Target, Barnes & Noble, or specialty toy/game store.  The "Buy" section of the website features a "Find a Store Near You" function which as of the date of this review says "coming soon...," but hopefully will be operational soon.

You can contact the folks at North Star Games here, find out current news about the games at the Insider's Corner, and check out their other fun products here.  Also be sure to visit the "Meet the Designers" section of the website for some cool info on who invested these games!

To say my family thoroughly enjoys this game would be an understatement.   If you're looking for a last-minute Christmas gift, please consider this game! 


To see other reviews of this product, click here. For giveaways, other product reviews and other fun things, follow the 2010-2011 TOS Homeschool Crew blog at:


Disclaimer: As part of the 2010-2011 TOS Homeschool Review Crew, I received the product described in this review at no cost in exchange for my fair, honest and unbiased (and not necessarily positive) review. No other compensation was received.


Wednesday, December 1, 2010

The Master Ruler - by Master Innovations (TOS Review)

Fractions.  The bane of many homeschool moms who are attempting to teach them - including, at times, this homeschooling mom.  Sometimes it seems like the girls "get it", sometimes it doesn't.


When I learned I'd be receiving the Master Ruler to review as part of the TOS homeschool review crew, I was intrigued. Honestly, I'd never heard of Master Innovations, Inc. the maker of the Master Ruler along with with several other products (including Master Clock, Master Fractions and Master Angles).  I had secretly hoped to receive Master Fractions (so I could evaluate how it reinforced our fraction knowledge) to review, but was very pleasantly surprised when the Master Ruler arrived - I could also use it for fraction practice!  

My package included the Master Ruler Standard ($9.95), the Master Ruler Metric ($9.95), the Master Ruler Workbook ($15.95) (available in English and English/Spanish, and ), and the Marvels of Measurement poster ($10.00).

The Master Ruler captured my attention immediately - this is a cool little teaching gadget!  Both the standard version and the metric version consist of spiral-bound "layers".  On the standard version, the "bottom" layer is opaque white, with inches marked in red.  Flip over the first see-through overlay and you see blue markings in half-inch increments, but the red inch markings on the bottom layer are still visible. This helps the child relate half-inches to inches. This method repeats on the following three overlays beginning with 1/4" increments (in green), 1/8" increments (in orange) and 1/16" increments (in purple). The inch markings on each overlay get shorter, so that the colored inch markings of each layer are visible at all times.  

I know that was very confusing, so here's a video that will better explain how the rulers are set up and how they work:


You can see other videos on Master Innovation's products here.  You can contact Master Innovations here

My girls loved playing with the rulers and using the workbook. The workbook pages are black/white which usually doesn't hold my kids' attention, but they were so interested in measuring and comparing that they didn't seem to care about the lack of color.  The workbook begins with a *great* reference chart on the metric system which includes a list of similar English measures.  The workbook includes measurement, map skills, scale drawings, area/perimeter, volume, diameter and measurement hints.  Warning - before you give the workbook to your kids, remove the answer key in the back!  My girls enjoyed working through the workbook, and have continued to use the master ruler to measure a variety of items throughout our house (including their feet!).  They now prefer the master ruler to a regular ruler and I agree with them since it's much easier to see the measurements!

The best result of our use of the master ruler is that the girls were able to see the relation between the different increments of measurement - the formerly abstract concept of fractions was made more concrete - a "light bulb" moment!

Genius - pure genius.  I highly recommend it.  This is one of those "why didn't I think of that?" products. 

Another beautiful result - the girls have *asked* if we can get the fractions and angles products from Master Innovations.  You have to love it when kids want to learn. 

To see my crewmates' reviews of this product and other Master Innovations products, click here.

For giveaways, other product reviews and other fun things, follow the 2010-2011 TOS Homeschool Crew blog at:


Disclaimer: As part of the 2010-2011 TOS Homeschool Review Crew, I received the product described in this review at no cost in exchange for my fair, honest and unbiased (and not necessarily positive) review. No other compensation was received.


Monday, November 15, 2010

Corps of Re-Discovery - Patchwork Quilt Kit (TOS Review)


I admit it.  I'm not crafty or inventive.  I know that crafts would "enrich" our homeschool, but seeing something that I have to put together or sew or glue or similar actions makes me want to tuck tail and run.  Naturally I worry that the girls are missing out on experiences, so I occasionally ignore the urge to run and plow right in.  Sometimes it works, sometimes it doesn't.

Two years ago I came across Corps of Re-Discovery at a homeschool conference.  Lured into their booth by the cornhusk dolls on display, I wandered around and explored their product kits. At that time we weren't doing anything with American history and, while I was intrigued by all the craft kits they offered, I left the booth empty-handed (and, may I say, a bit relieved).

Corps of Re-Discovery is the business of a homeschool family who studied American history by studying America. Imagine an extended trek through 47 states - what is a dream for many of us became a reality for this family when they traveled the country in a 32-foot motor home for fourteen months.  Their journey inspired the family to form Corps of Re-Discovery, which offers project kits and other items relating to (a) American Indians, (b) Frontiersmen, (c) Pioneer and Colonial and (d) Leather Working.  Prices range from $1.99 (for a raccoon tail) to $71.92 (for a combination pack of six of the Pioneer kits).  You can contact Corps of Re-Discovery here.

This year at the homeschool conference was a different story, since the spine we're using covers American History - so when I walked by their booth I remembered what neat kits they offered and felt compelled to go in and actually buy something.  My girls *love* American Girl dolls, so I knew Corps of Re-Discovery's patchwork quilt kit would be a huge hit.  Problem was, they only had a few quilt kits left, and I couldn't find just the right pattern/color for Puddin.  I purchased one that I knew Punkin would like, with the intention of ordering another for Puddin from their website.

Since I'm the world's worst procrastinator, that order was never placed so the lone quilt kit sat taunting me for months.

I was delighted when I learned I'd be receiving a patchwork quilt kit from Corps of Re-Discovery to review for the TOS Homeschool crew - now both girls would have a quilt kit!  Of course, that also meant that I'd actually have to be creative, so my delight was tempered with a bit of dread.  One afternoon I bravely brought out the quilt kits to show the girls.  Luckily Puddin loved the color/pattern choice on the quilt we received for this review, so both girls were happy and ready to get started.


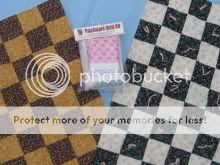
We took everything out of the pouches - the quilt kits come with 100% cotton pre-cut fabric pieces for the quilt top, fabric for the backing, polyester batting, thread and yarn.  Also needed to complete the quilt are a sewing needle, yarn  needle, scissors, tape measure or ruler, and an iron. 


I doled out the fabric pieces to the girls with a little explanation about how to lay them out, and off they went to plan.


Both girls worked on their layouts for quite a while - I think they were seeking quilt perfection!

While they were planning their quilt layouts, I read the three pages of instruction.  And read them again.  And again.  (Did I mention that I'm not very crafty?)  After the third time through, I became a bit frustrated with the lack of pictures/diagrams.  I grabbed a piece of paper and started reading through the instructions again, this time making diagrams as I went along.  After I finished, I had a much clearer picture of what to do and how to do it.  (Hmm...does that make me a visual learner?)  Even though the kit comes with three pages of fairly detailed instructions, it would still be beneficial to have additional diagrams included - and since the instructions are printed two-sided there is an entire side of the paper that is blank, meaning there's plenty of room for more diagrams to help non-sewers and non-quilters like me. 

By the time the girls decided on their final layout, I was too flustered to continue for very long (note this was primarily from feeling inept at projects like - no reflection on the product itself).  We sewed a few squares together, but my girls (warning - guilty admission coming) have never sewn by hand or used a sewing machine, so it wasn't really something I felt they could do on their own. Our quilts remain unfinished at the moment, simply because of scheduling issues (we're in the throes of Nutcracker rehearsals).  One note - don't let my creative failure stop you from trying the quilt kit.

After the busy-ness of the holiday season is over, we are determined to finish this project because I know the quilts will be adorable.  The patterns/colors they choose for the kits are very pretty, and I'm thrilled that most of the necessary items come in the kit (except for things that you'd normally have around the house).  I'm also hoping this project will give the girls hand-sewing skills (and confidence) so that they can continue doing projects like this.  Since Punkin loves to draw dress designs on paper, I suspect she will want to design her own quilt.  That spark of creativity will be worth 1000 times the price of the quilt kit (which, by the way, is regularly $14.99; the kit is on sale at the time of this review for $11.99).

We hope to try some of the other kits Corps of Re-Discovery offers, but won't do so until we finish the quilts.  Be sure to check out all the other kits that make fabulous hands-on activities to all American history studies.  I'll be reading with interest the reviews of my crewmates (some of whom received different kits to review), which you can find here


For giveaways, other product reviews and other fun things, follow the 2010-2011 TOS Homeschool Crew blog at:


Disclaimer: As part of the 2010-2011 TOS Homeschool Review Crew, I received the product described in this review at no cost in exchange for my fair, honest and unbiased (and not necessarily positive) review. No other compensation was received.

Friday, October 29, 2010

Yuck! (that is, Yuck by Buckets-O-Fun!) - TOS review

Recent conversation in our house:

Me:  "Guess what we're reviewing next?"

My kids:  "What?"

Me:  "Some stuff called "Yuck!"

My kids:  "Cool," followed quickly by squeals.

Note that I have *girls* and not boys - but I have girls who love science, and who love nothing better than messy science.  Yuck fit the bill perfectly.  Luckily I don't mind mess.

As part of the TOS homeschool review crew, I received small samples of four different types of "Yuck" from Buckets-O-Fun:  Chunky Yuck, Saucy Yuck, Sticky Yuck, and Snowy Yuck.  

Click here to see pictures of Yuck "finished products".

My sample of Snowy Yuck was very small, because it spilled a bit while in the mail.  (I chuckle when I think about it spilling out of the envelope and then getting exposed to water!)

In case you're wondering what Yuck is.  Yuck is a polymer -  www.dictionary.com defines "polymer" as:
Any of various chemical compounds made of smaller, identical molecules (called monomers) linked together. Some polymers, like cellulose, occur naturally, while others, like nylon, are artificial. Polymers have extremely high molecular weights, make up many of the tissues of organisms, and have extremely varied and versatile uses in industry, such as in making plastics, concrete, glass, and rubber.  
According to the 4-page pamphlet sent with our Yuck samples, "poly" means many and "mer" means part or segment.  This small pamphlet also includes a material list (really just measuring gear and water), instructions and suggested observation topics for each form of Yuck. 

On its website, Buckets-O-Fun describes itself as "a one stop shopping with unique products for the creation of fun filled social and recreational events. BOF has brought together all of the products needed, saving you the time, energy, expense and frustration of searching.  The girls and I peeked at the rest of the products available on the website, and next on the girls' list (well, next after we buy some more Chunky Yuck) is a set of "belly bumpers" (see them here!).  The letter I received with the samples advised that the company is teaming up with a science teacher to develop affordable, easy projects for schools and at home - I'll be interested to see what develops!

Even though we talked about the definition of polymer and read about natural/artificial things that are polymers, the girls weren't too interested in the discussions - they wanted to get to the "fun stuff". 

We started with the Chunky Yuck.  


That big, green-rimmed bowl sure sees its share of science experiments. 

To say the girls were happy to get started was an understatement.


Following the instructions, we poured, measured, poured and observed.  The Chunky Yuck is about the size of rock salt, and we started out with a little less than 1 tbsp.


The Chunky Yuck started absorbing the water almost immediately, so Puddin couldn't *wait* to get her hands in it - Punkin was a bit more cautious, preferring to investigate with a measuring spoon at first.


But eventually she found her courage. 


 After 30 minutes, the Chunky Yuck had grown:


After a little more than an hour, all the water we initially added (2 c.) had been absorbed, so we added 2 more cups.

We put it aside and moved on to other things (including the other 3 Yuck samples).  When we came back to the Chunky Yuck, all of that second portion of water had been absorbed.  We added more water, and by the next morning noticed a significant size difference.  Look at how it grew (remember, it started out the size of rock salt) - the piece closest to the measuring tape was one piece of Chunky Yuck:


We have not yet let it dry out, simply because the girls are having so much fun just playing with it.  

While a number of my fellow crewmates noted that the 4-page pamphlet provided minimal information, I preferred it that way - the limited activities on the pamphlet let my girls' imaginations go wild with what they wanted to do next.  They want to get some more Chunky Yuck and do more in-depth experiments - their ideas include comparing adding water in a bowl kept at room temperature versus adding water in a bowl kept in the fridge (to see how it affects the speed of absorption), coloring it (Buckets-O-Fun actually has some Yuck tints in their Yuck "accessories"), comparing absorption time versus dehdyration time, comparing time to hydrate on a dry day versus time to hydrate on a humid day, etc.  I love that this project sparked so many ideas for other experiments.

We used the other three samples while the Chunky Yuck was absorbing the water, and basically did the same process.  One pic of interest - when we used the Sticky Yuck, Puddin insisted that My Hero try it out - pretty funny.  Be warned - the Sticky Yuck is a little tricky to clean  up.  In retrospect, I wish I'd not used my faithful green-rimmed bowl and rather used a disposable plastic bowl.


You can see Yuck demonstrations on YouTube here.   This page includes a link for Yuck games, but I could not get the link to work.  
  
A couple of things of note.  There are warnings on the packaging not to let this stuff go down the drain (can you imagine this stuff in the water system?).  Don't swallow it or get it into your eyes or open wounds.  Basically, just use common sense when using it.  You can find safety guidelines here.

A 1-lb. container of the various Yuck types ranges in price from $16 to $20.  Yuck also comes in 5-lb. and 50-lb. containers.

Contact info for Buckets-O-Fun:

Buckets-O-Fun
6436 SE 134 th Ave.
Portland, OR 97236
800-223-6901
503-760-8880 (local)
503-761-2052 (Fax)

orders@buckets-o-fun.com


Yuck was a big hit in our house.  The girls are already asking when we can order some more Chunky Yuck (which was their favorite), and we are thinking about how we might incorporate it into a science fair project.

To see other reviews of this product, click here. For giveaways, other product reviews and other fun things, follow the 2010-2011 TOS Homeschool Crew blog at:


Disclaimer: As part of the 2010-2011 TOS Homeschool Review Crew, I received the product described in this review at no cost in exchange for my fair, honest and unbiased (and not necessarily positive) review. No other compensation was received.



Wednesday, October 27, 2010

halloween or no halloween?

Do you allow your kids to dress up for halloween?  Many homeschool families I know are vehement about not "observing" or "celebrating" halloween.  We don't "celebrate" it either (at least not in the way that I think of a celebration), but I do allow the girls to dress up, with certain restrictions - no gore, no witches, no ghosts, no ghouls, etc.  I always loved trick or treating as a kid and my girls do too.  

This year the girls will have had four (yes, count them, FOUR) costumes by the time halloween comes and goes.


First, we went to Disney and we booked a makeover for them at the Bibbidi Bobbidi Boutique. CUTE!  They had so much fun getting their makeovers.  They both chose Ariel costumes - Punkin chose the Ariel bridal costume and Puddin chose the Ariel mermaid costume.  Here they are in costume waiting to have their hair and makeup done:


Next, our beloved Heard Nature Museum had a halloween event.  The girls wanted to wear their "real" halloween costumes, but knowing them I thought better of that idea.  Several years back I purchased poodle skirts, so we scrambled to find poodle skirt accessories and I think they turned out really wel:


Aren't they cute?  Unfortunately, the winners of the Heard's costume contest were the kids who dressed in blood/gore/witches/Harry Potter.  The girls were disappointed, but I used it as a teaching moment about the world and worldly influences.


This past weekend they informed me that Wednesday night (tonight) was favorite Bible character costume night at Awana (Approved Workmen Are Not Ashamed!).  Punkin's costume of choice was Mary with Baby Jesus, and Puddin chose to be the angel Gabriel.  Again, they turned out nicely:


I love shopping at Ross - I found the perfect accessories to turn a white nightgown into a Mary costume.  Could that blue shawl have been any more perfect?  Add a patterned scarf for a headcovering and a light blue scarf as a belt (both of which perfectly coordinate with the blue shawl) and you have a Mary costume.

Next up?  The night of October 31.  Puddin will revise her angel costume slightly, and Punkin will be a gypsy, which I allowed this year even though it's getting awfully close to my off-limits line.  No pics yet - check back after halloween!  We'll "borrow" our cousins' neighborhood again for trick-or-treat since our own neighborhood tends not to do much for *any* holiday.


BOO!